After registering your app on the Accela Developer Portal, you have several ways to create a Windows app project using the Accela Windows SDK:
■ Creating an app and installing Accela SDK in Visual Studio
■ Creating an app from an Accela SDK project template
■ Adding_Accela_Windows_SDK_to_an_existing_project
In the following procedure, you will create a new Visual Studio project and install the Accela Windows SDK from NuGet via Visual Studio’s Library Package Manager.
To create an app with installed Accela SDK
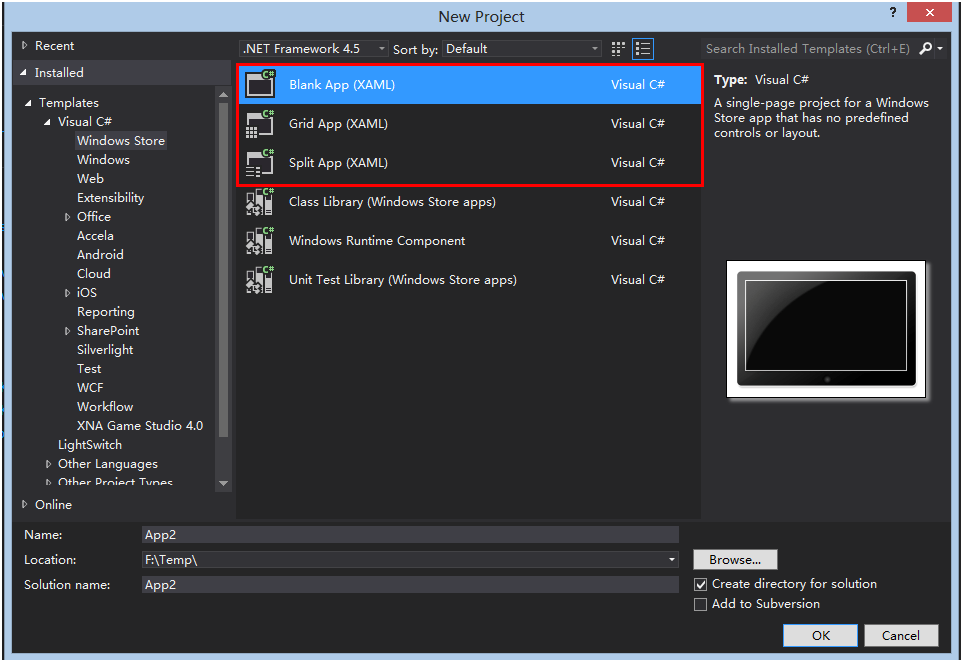
1. Open Microsoft Visual Studio.
2. On the File menu, select New and then click Project.
The New Project window appears.
3. In the left pane, click Installed.
4. In the middle pane, select the desired project type such as Blank App, Grid App, or Split App.
5. Complete these fields as needed.
Name |
Enter the name of the project, which is also the app name that users can see. After the project is created, you can also modify the project name. See Modifying Details about Your App for more information. |
Location |
Use the Browse button to specify where you want to save the project files. |
Solution name |
Enter the name of the solution. By default, it is the same with the project name. |
6. Click OK.
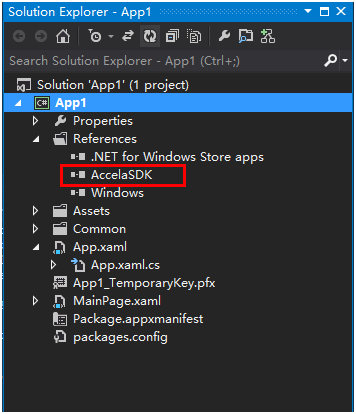
The new project is created. Now you are ready to install Accela SDK.
7. From the Tools menu, select Library Package Manager and then click Package Manager Console.
8. On the Package Manager Console, enter the following command:
PM> Install-Package AccelaSDK
Visual Studio retrieves the latest Accela SDK package from the NuGet Gallery and installs it in the project you just created. After the Accela SDK has been installed, the Solution Explorer pod displays the references that Visual Studio has added for the installed SDK.
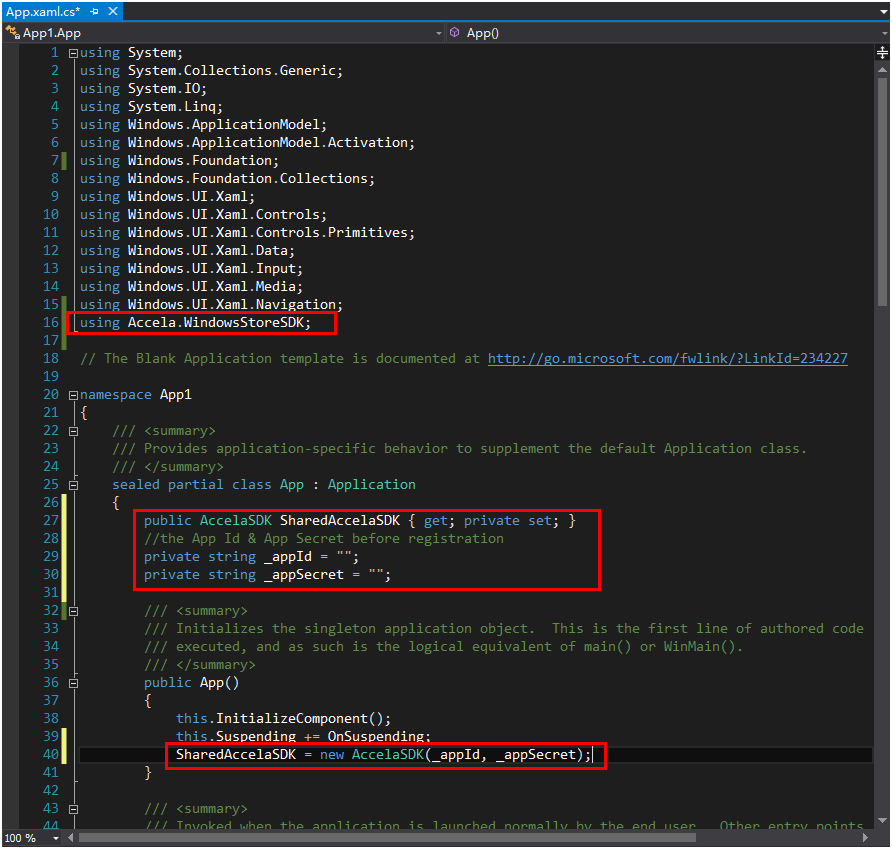
9. In the Solution Explorer pod, double-click the code-behind class file named App.xaml.cs and complete the following configuration tasks:
a. In the App class, import the following namespace:
using Accela.WindowsStoreSDK;
b. In the App class, declare the following variables.
Public AccelaSDK ShareAccelaSDK { get; private set; }
//the App Id & App Secret before registration
private string _appId = "";
private string _appSecret = "";
c. Add the app ID and app secret that you noted down in Registering Your Windows Store App on the Accela Developer Portal as the values for the _appId and _appSecret variables. Here is an example.
private string _appId = "12345678901234567";
private string _appSecret = "a12b34c5d678e9f0ag1h23456ij78kl";
d. In the App class constructor, add the following code to the App class:
SharedAccelaSDK = new AccelaSDK(_appId, _appSecret);
After the configuration, the code-behind file now looks like this:
10. Build and run the application as you want.
Accela provides a set of Visual Studio project templates for your Windows app. After downloading and installing the template package into Visual Studio, you can use a project template to create your custom A311 app, agency app, or citizen app. The project templates add the necessary files and references for the project type, which makes your app development easier.
To use the project template to create an app
1. Download the Accela Windows 8 SDK project templates.
2. Open Visual Studio.
3. On the File menu, select New and then click Project.
4. In the left pane of the New Project window, navigate to Installed > Templates > Visual C# > Accela.
The New Project window displays the project templates you have installed.
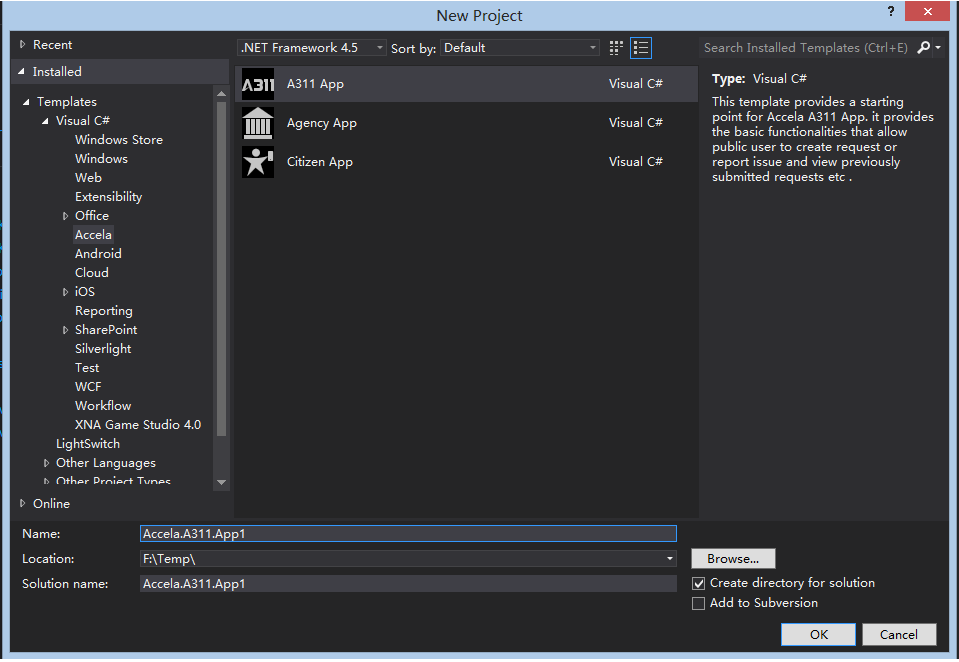
5. In the middle pane, select the desired project template from which you want to create the new app.
6. Complete these fields as needed.
Name |
Enter the name of the project, which is also the app name that users can see. After the project is created, you can also modify the project name. See Modifying Details about Your App for more information. |
Location |
Use the Browse button to specify where you want to save the project files. |
Solution name |
Enter the name of the solution. By default, it is the same as the project name. |
7. Click OK.
The New Accela App Project window appears.
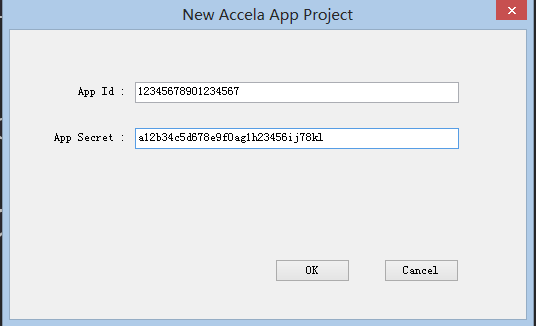
8. Enter the app ID and app secret that you noted down in Registering Your Windows Store App on the Accela Developer Portal and click OK.
The new app is created.
9. If you see a reference error as follows, do the following:

a. On the Build menu, select Configuration Manager.
The Configuration Manager window appears.
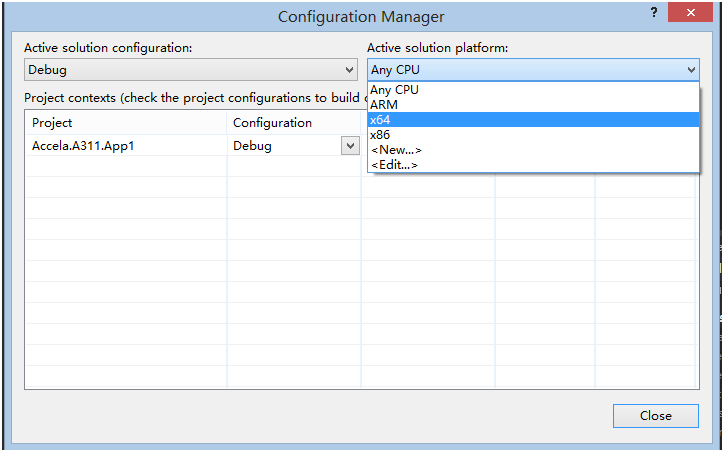
b. Select the specific target platform for your app from the Active solution platform drop-down list.
Note: Do not choose “Any CPU” because it will cause compilation errors when you build and run the project. |
10. Build and run the application.
If you have an existing Windows app, download the Accela Windows SDK and add the downloaded DLL file to your app's project references. For example:
![]()